Hello everyone
I hope you are all well into 2016 and things are settled down after the holidays. Speaking for myself, I am now extraordinarily busy as a result of surgery on 1st February, again on 15th February and scheduled another operation for 23rd February.
Aside from the above, I thought the kit this month was really special. You have probably noticed that I have added several pieces to the galleria and I do hope you all like them.
This month, I thought we could investigate a little more about editing photos. We will be looking at the dodge and burn tools in Photoshop cc and Photoshop Elements.
First off, let's go find a photo.
I have opened up my Bridge and navigated to a folder called copyright free images.
You will see from the above that I have dozens and dozens to choose from! Here is a photo that I thought would show you some uses for dodge and burn.
Always make a duplicate layer or two at this point so you have two photos to work with. I have also renamed the two duplicate layers. To do that double click the layer name with the cursor over it and when the existing text is highlighted you can go ahead and type your new name.
Let's look at dodge first. The tool itself looks like a filled in magnifying glass and on my workspace it is located in the middle of the vertical tool panel on the left side of the screen. The dodge tool will lighten selected areas on your photo. Below is a fairly exagerrated version so you can see the tool in action. I selected a fairly large round fuzzy brush to do this with just to show you what effect the dodge tool has.
To me this image looks over cooked so I am going to back off the brushed dodge and make it somewhat less pronounced.
I just went ahead and painted over the middle of the photo at 90% opacity to make the highlight very subtle. I do hope you can see that in the screenshot below.
You have all probably guessed by now that the burn tool does the opposite of the dodge tool!!! It is located in the submenu behind the dodge tool and looks like a hand with just the index finger and thumb touching.
Below I have done a burn on the same part of the image that I did the dodge on. Again this is very exagerrated so you can see what the tool actually does.
What I am now going to do is make the outer edges and sides of this photo somewhat darker almost creating a vignette.
You can definitely see that the sides of this photo are very much darker but have not lost very much detail.
Both the dodge and burn tool lighten and darken while preserving the underlying detail.
At this point, I played around a bit with the opacity of the dodge layer and then merged the visible layers together.
This is the resulting image.
Here are both images side by side so you can see the effects of both the dodge (lighten) and the burn (darken) tools.
On my screen the dodge and burn are both very pronounced and I think that this photo has a somewhat stormy feel to it now that I have edited it. Anyway, now to the layout. Back to the Bridge and open up all the Crewel and Unusual kit.
I am going to have to recolor quite a lot of the components to match the photo but ... I think the result will be quite dramatic.
Here are the components of the kit.
As always open up a new file, I use 12" x 12" at 300ppi.
Bring in some background paper and recolor using the eyedropper tool.
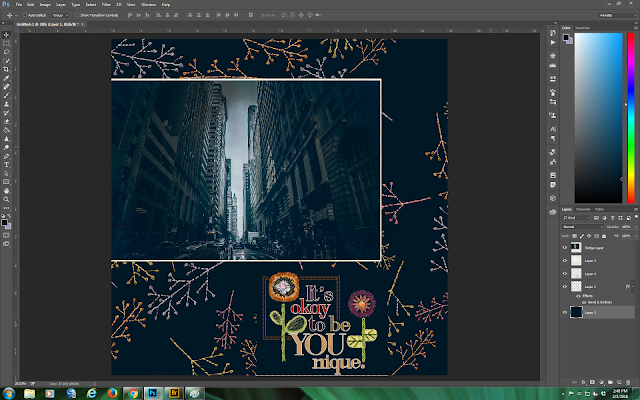
Here you can see that I am already building the layout using some papers and an overlay.
Finally I added one of the wonderful pieces of word art that came with the kit.
I think this is now complete. The photo is very atmospheric and the overlay and word art make it truly pop.
I do hope you have enjoyed my explanation of the dodge and burn tools in photoshop and the creative process for the layout.
Looking forward to seeing you again next month.


WOW what a dramatic layout. Love it Annette!
ReplyDeleteThank you so much Julie. And .... woo hoo!! Managed to get the linky thingy to work properly!
DeleteWhen I saw your photo choice,I had no ide what you were going to do,.but the result is stinning,Annette.
ReplyDeleteHope you are doing well, healing hugs, Hetty
Thank you Hetty. Slooooow progress and next surgery is on 1st March - hopefully the last one for a while. Thank you for your hugs.
DeleteThat is one stunning photo, Annette! Thanks for inspiring me to use the dodge and burn tool more often.
ReplyDeleteMany thanks Lisa.
DeleteStunning...again...as always Annette!
ReplyDeleteThank you so much Kay.
Delete