Come New Year's Day and I could not wait to get on my computer and see what came with this spectacular kit to start 2017 off with. I did notice that there is a great brown in the color palette of this kit together with a great yellow. Combined those two colors would probably make a good sepia!
That being said, I opened up a brand new blank canvas 12" x 12" at 300 ppi and brought in a photo of a friend of mine when he was a baby. This friend has given permission for me to use this photo.

Then I opened up all the goodies and papers that come with Color Me Happy.

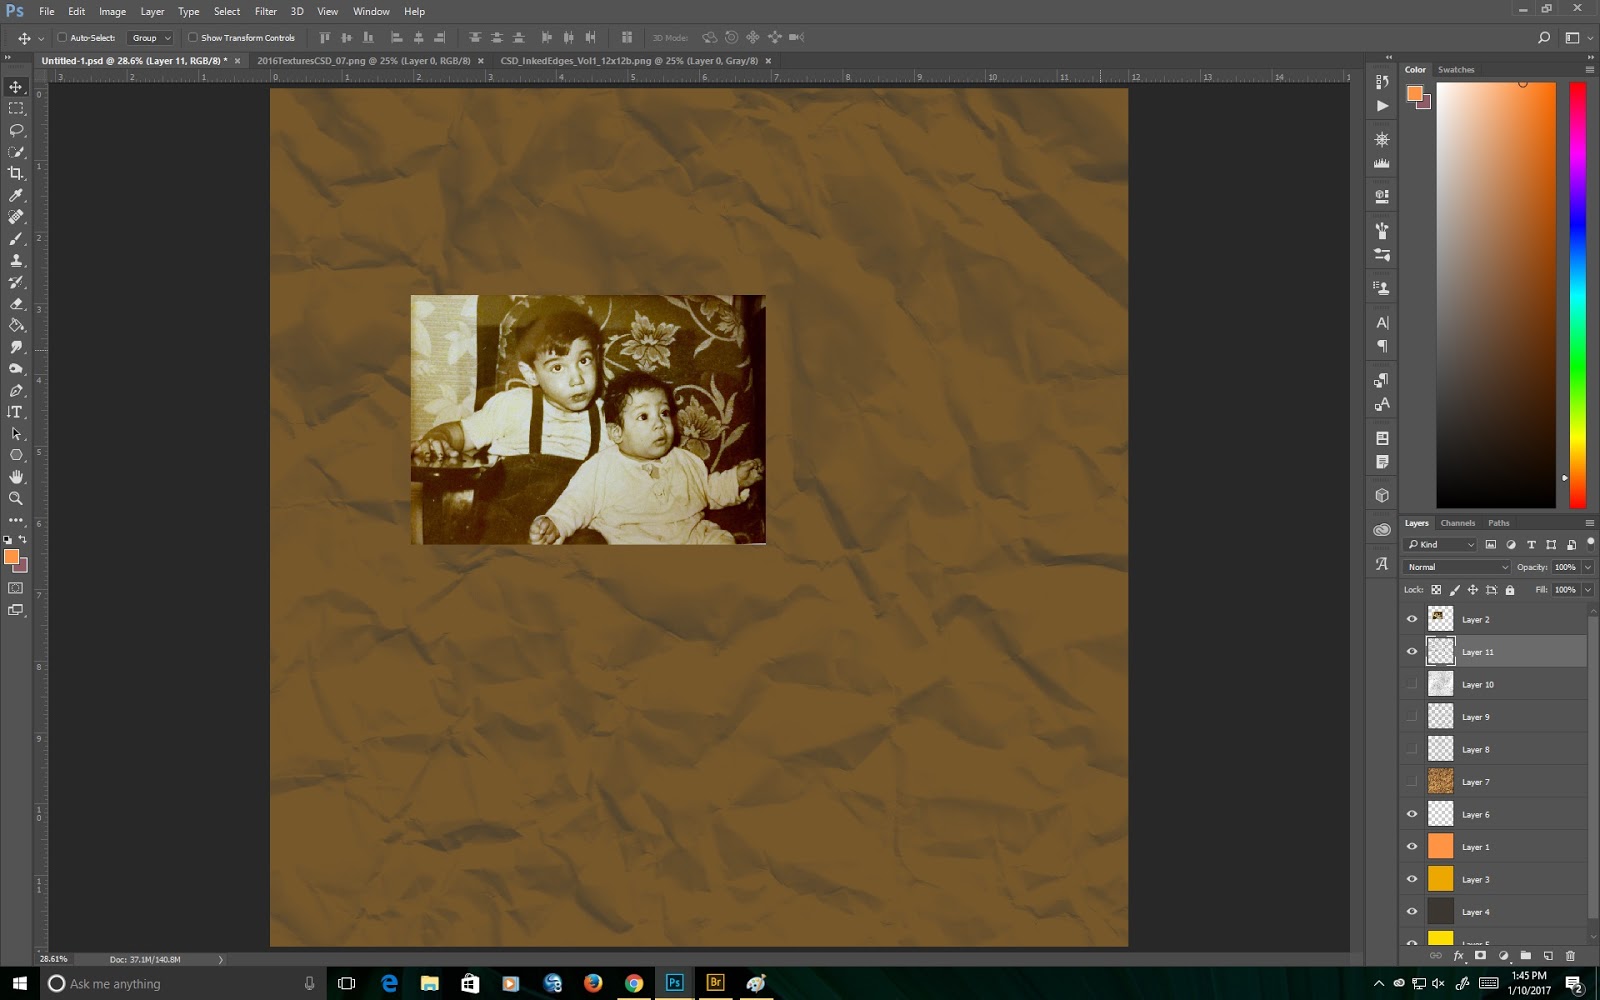
Since we do not get plain papers in the digital kit, I went ahead and created some blank layers which I filled with the paint bucket tool with colors selected from various components of the kit. You can see the several layers of different colors behind the photo below.

Now is the time to get creative and blend the colors to match the sepia of the photo.
To do this, you can play around with the opacity and order of the layers until you find some kind of happy medium. I am off to do that now. The top orange layer I took down to 15% opacity and the next layer down (the dark yellow) I took down to 20% opacity.

Here you can see that the tone seems to be a really good match to the sepia in the original photo.
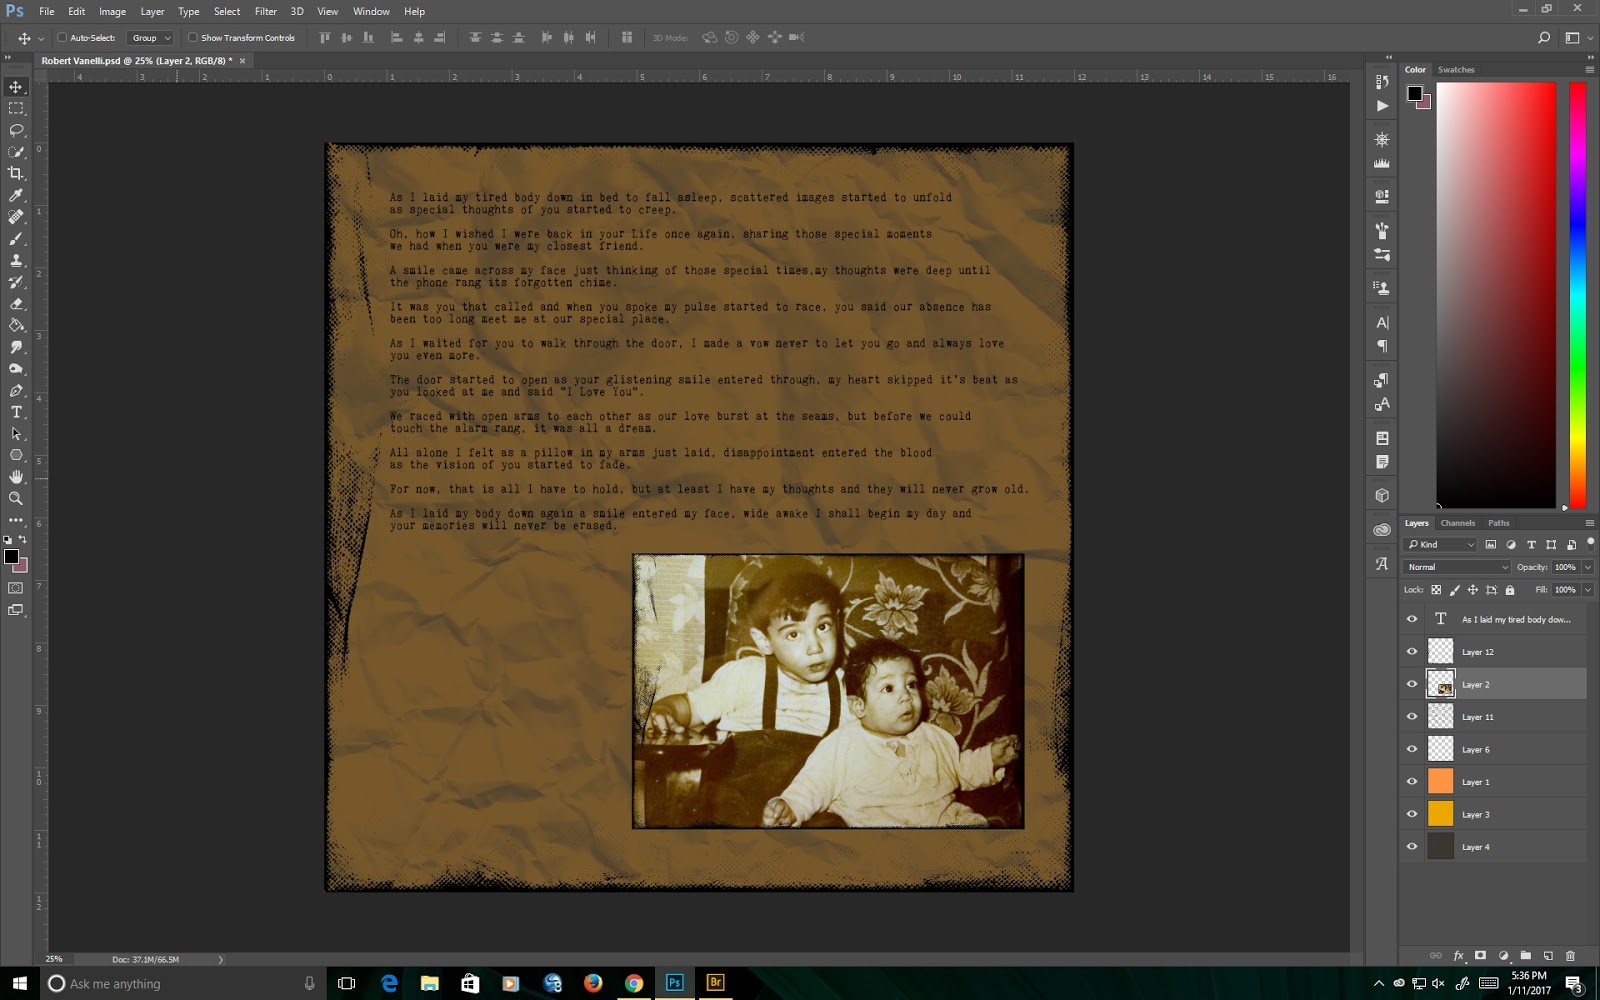
The next thing I decided to do was to try and create something that looked a bit like tea stain digitally so that I could add a link to Lisa's technique blog challenge this month. That actually proved a whole lot easier than I though it would be. I just went to my trusty Club Scrap overlays. I could not find a really good overlay from my CS stash, so I found another and clipped the dark brown to the overlay so as to maintain the transparency of it. Then merged those two layers and brought in the new overlay below the photo layer.
While looking for a good overlay I also came across CS Inked edges Vol 1 which were released ages ago, and I have brought one of those in as well and used it on the edge of the background and on the edge of the photo.

Now I am going to make a separate layer with the text that I want to use which is actually a poem written by the owner of the photo. He has also given permission for me to use his poem. Here is the wording:
As I laid my tied body down in bed to fall asleep, scattered images started to unfold
as special thoughts of you started to creep.
Oh, how I wished I were back in your Life once again, sharing those special moments
we had when you were my closest friend.
A smile came across my face just thinking of those special times, my thoughts were deep until
the phone range its forgotten chime.
It was you that called and when you spoke my pulse started to race, you said our absence has
been too long meet me at our special place.
As I waited for you to walk through the door, I made a vow never to let you go and always love
you even more.
The door started to open as your glistening smile entered through, my hear skipped it's beat as
you looked at me and said "I Love You".
We raced with open arms to each other as our love burst at the seams, but before we could
touch the alarm rang, it was all a dream.
All alone I felt as a pillow in my arms just laid, disappointment entered the blood
as the vision of you started to fade.
For now, that is all I have to hold, but at least I have my thoughts and they will never grow old.
As I laid my body down again a smile entered my face, wide awake I shall begin my day and
your memories will never be erased.
OK, the text layer is now in place and I decided to increase the size of the photo and move it to the bottom right of the layout.
It is now time to create the embellishment that I would like to use. I opened up the sheet of stamp images. Back shortly when I have made what I think will work.

OK Back again. Here is what I came up with. I used that cluster stamp in the middle of the bottom row of images and one of the border strips to make what you can now see.

Just went off in search of a bow and found one that works with the tone of this layout. It came from May 2008 so I think it is Body and Soul.
Anyway this is what it looks like now.

I do hope you like what I have done so far. Now the only thing to do is to add tea stains! For that I went off to find the wonderful cup stain that came with memoirs! I loved that kit which came in July 2009.
This is the stamp.

To make it into a stamp, go to edit>define brush preset> enter. At this point I added several layers and lightly stamped in a matching color and in various places and orientations.
Here is the completed layout.

I hope you like this layout.
Also, a heartfelt thank you to Robert Vanelli who kindly gave permission for me to use his photo and poem in order to create this.